'/%3e%3c/svg%3e)


How to Make an Insect Hotel – Step-by-Step Guide
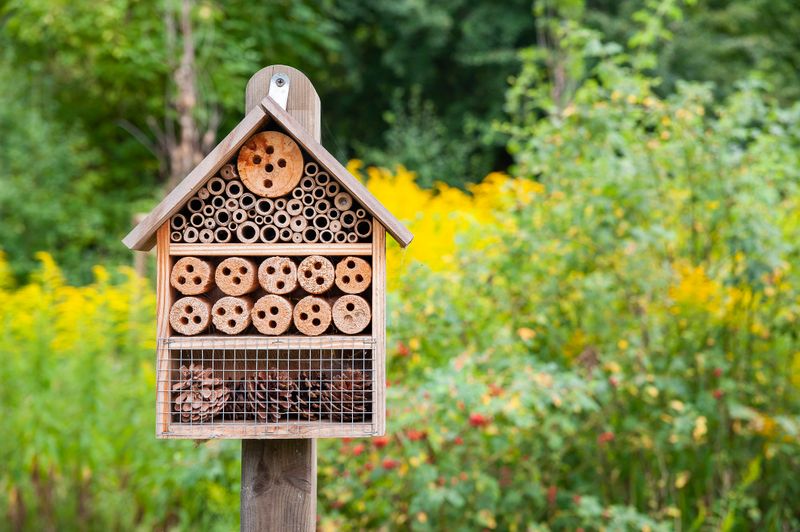
An insect hotel is a great way to teach children about nature while working on a fun and practical project. Below you'll find a list of what you need, how to get started, and which steps to follow.
You can make your insect hotel as big or small as you like, and use different materials to make it truly unique. It’s a fantastic activity to do with children, though some steps are best done by adults or under adult supervision.
What You’ll Need
Making an insect hotel doesn’t require much. It’s a creative project that uses both natural and recyclable materials. Here's a list of the basic supplies:
- Base of the hotel: A wooden crate, box, or sturdy plank
- Wood blocks: around 10–15 cm in diameter
- Bamboo sticks: perfect for bees and other insects
- Pinecones
- Filler materials:
- Reeds
- Wood chips
- Dead or rotting wood
- Corrugated cardboard
- Moss
- Dried flowers
- Twigs, hay, straw
- Nuts or seeds
- Post or hanging material: for mounting your hotel
- Drill: to make holes in the wood blocks (best done by an adult)
- Paper and pencil: to sketch your hotel and plan the layout
- Wire mesh or fencing: for the back of the hotel or to keep items in place
- Staples, nails, or screws: for securing the mesh
Let’s Get Started!
Step 1: Choose the Location and Design Your Hotel
Before you start, decide where you want to place the insect hotel—on a post in the garden or hanging from a tree? If mounting it on a post, make sure it can be firmly fixed in place. Draw a sketch of your design to help visualize the layout and avoid running out of materials mid-project.
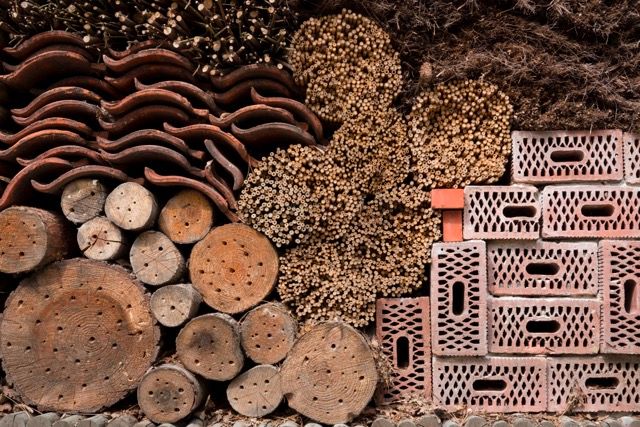
Step 2: Gather Materials
This is the first real step in the process. Collect all the items you need, from bamboo sticks to twigs and moss. Get your kids involved—let them help you find leaves, flowers, and branches in the garden or park. Be sure to use dry, natural materials to prevent mold or rotting.
Step 3: Build the Base
Choose a wooden crate, box, or construct a small house shape as the base. This forms the frame of your hotel. You can divide it into different “floors” using small planks across the crate. These sections provide spaces where insects can shelter. In our example, we’ll create three floors.
Step 4: Fill the Sections
Now it’s time to fill the different sections. Start by placing wood blocks in one of the compartments. If you're using square blocks, don’t place them too tightly together—leave enough space for insects to crawl in. Leave some parts empty to fill later with other materials like moss or straw.
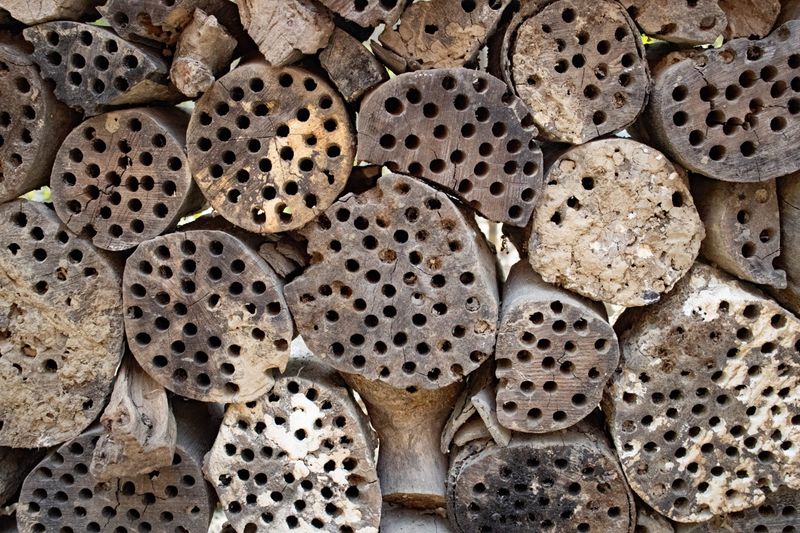
Step 5: Drill Holes in the Wood Blocks
Wood blocks are great for bees, flies, and wasps. Drill holes about 10 cm deep into the wood blocks. Leave a few centimeters of space between the holes, and ensure the drill goes deep enough. Be cautious—especially with harder woods. (This step is best done by an adult.)
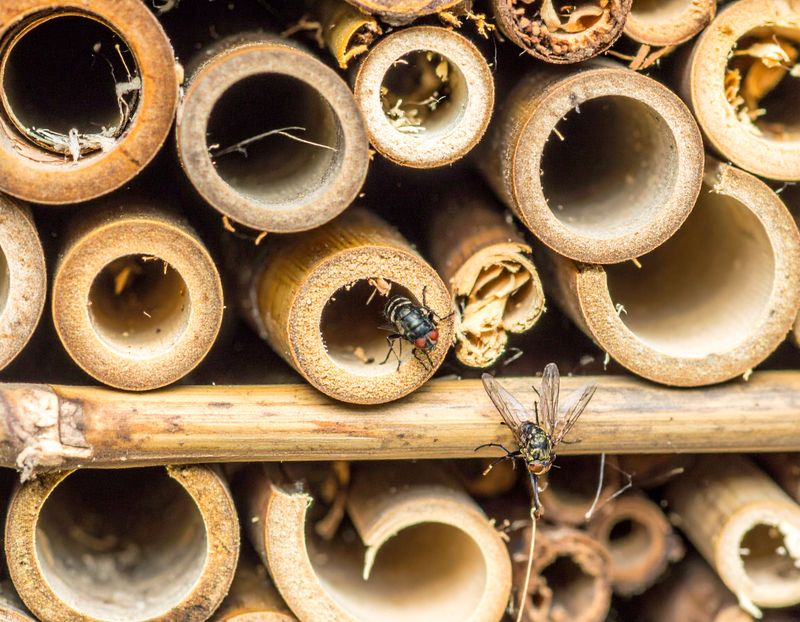
Step 6: Fill the Top Section with Bamboo
Fill the top section with bamboo sticks (facing outward) and other natural items. The more variety, the better! Insects love different textures and materials—try adding twigs, reeds, straw, dried flowers, and leaves.
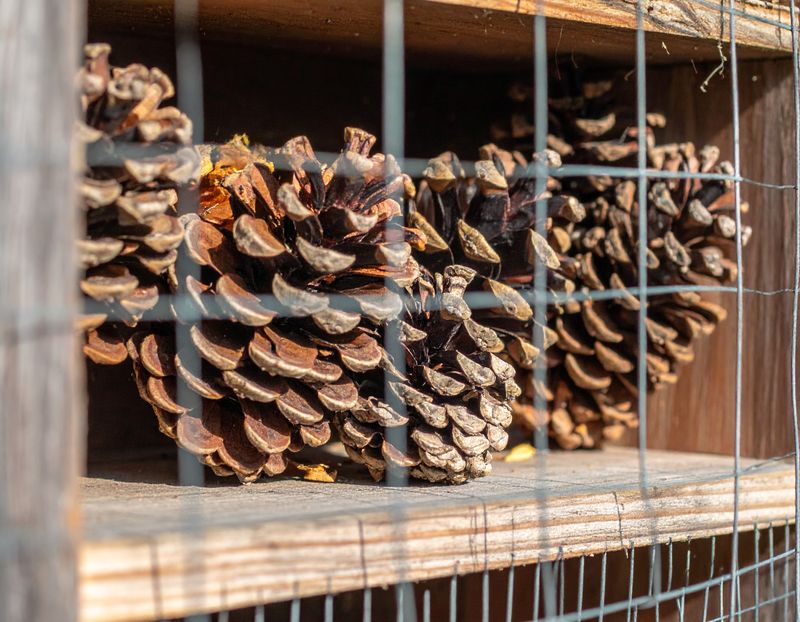
Step 7: Fill the Bottom Section with Pinecones and Secure It
Fill the bottom section with pinecones until it’s full. Cut a piece of mesh to size and secure it over the opening using staples, nails, or screws to keep the pinecones in place.
Step 8: Place or Hang Your Insect Hotel
Once your insect hotel is complete, it’s time to place it in your garden or another suitable location. You can place it on a post or hang it from a tree using strong wire or string. Make sure it's in a sheltered spot, away from strong wind or rain. Insects prefer warm, protected spaces—sunny or partially shaded areas are ideal.
Step 9: Wait and Observe
Now for the most exciting part—waiting for your first visitors! It may take a little while, but soon you'll notice a variety of helpful insects moving in, supporting the health of your garden.


'%3e%3cmetadata%20id='metadata11'%3e%3crdf:RDF%3e%3ccc:Work%20rdf:about=''%3e%3cdc:format%3eimage/svg+xml%3c/dc:format%3e%3cdc:type%20rdf:resource='http://purl.org/dc/dcmitype/StillImage'%20/%3e%3cdc:title%3e%3c/dc:title%3e%3c/cc:Work%3e%3c/rdf:RDF%3e%3c/metadata%3e%3cdefs%20id='defs9'%20/%3e%3csodipodi:namedview%20pagecolor='%23ffffff'%20bordercolor='%23666666'%20borderopacity='1'%20objecttolerance='10'%20gridtolerance='10'%20guidetolerance='10'%20inkscape:pageopacity='0'%20inkscape:pageshadow='2'%20inkscape:window-width='1680'%20inkscape:window-height='988'%20id='namedview7'%20showgrid='false'%20fit-margin-top='0'%20fit-margin-left='0'%20fit-margin-right='0'%20fit-margin-bottom='0'%20inkscape:zoom='2'%20inkscape:cx='117.60352'%20inkscape:cy='-18.612463'%20inkscape:window-x='-8'%20inkscape:window-y='-8'%20inkscape:window-maximized='1'%20inkscape:current-layer='Ebene_1'%20/%3e%3cpolygon%20fill='%23fecc00'%20points='0,38.786%200,0%20175.748,0%20175.748,38.786%20'%20id='polygon2'%20/%3e%3cpath%20fill='%23d50029'%20d='m%2056.665,16.206%20c%20-0.768,1.04%20-2.053,2.848%20-2.835,3.904%20-0.397,0.537%20-1.114,1.512%201.263,1.512%202.515,0%2012.515,0%2012.515,0%200,0%202.017,-2.744%203.708,-5.039%202.3,-3.122%200.199,-9.618%20-8.024,-9.618%20-7.36,0%20-32.384,0%20-32.384,0%20l%20-5.615,7.629%20c%200,0%2029.109,0%2030.603,0%201.545,0%201.524,0.588%200.769,1.612%20z%20m%20-9.194,7.298%20c%20-2.377,0%20-1.66,-0.977%20-1.263,-1.514%200.782,-1.056%202.088,-2.845%202.856,-3.885%200.756,-1.024%200.776,-1.612%20-0.771,-1.612%20-1.493,0%20-13.996,0%20-13.996,0%20L%2023.02,31.819%20c%200,0%2020.141,0%2027.501,0%209.083,0%2014.14,-6.178%2015.699,-8.314%200,-10e-4%20-16.235,-10e-4%20-18.749,-10e-4%20z%20m%2017.89,8.315%20h%2016.133%20l%206.116,-8.316%20-16.131,0.002%20c%20-0.005,-10e-4%20-6.118,8.314%20-6.118,8.314%20z%20m%2041.625,-24.854%20-6.188,8.405%20h%20-7.2%20L%2099.783,6.965%20H%2083.655%20l%20-10.79,14.657%20h%2039.46%20L%20123.112,6.965%20Z%20M%2088.694,31.819%20h%2016.127%20l%206.119,-8.314%20H%2094.813%20c%20-0.006,-10e-4%20-6.119,8.314%20-6.119,8.314%20z%20M%200,26.784%20v%201.766%20h%2022.468%20l%201.298,-1.766%20z%20m%2026.181,-3.28%20H%200%20v%201.764%20H%2024.88%20Z%20M%200,31.819%20h%2020.061%20l%201.292,-1.756%20H%200%20Z%20m%20152.072,-3.27%20h%2023.676%20v%20-1.766%20h%20-22.376%20z%20m%20-2.405,3.27%20h%2026.081%20v%20-1.756%20h%20-24.79%20z%20m%206.116,-8.315%20-1.297,1.766%20h%2021.262%20V%2023.504%20Z%20M%20134.659,21.622%20145.448,6.965%20h%20-17.081%20c%20-0.006,0%20-10.797,14.657%20-10.797,14.657%20z%20m%20-18.472,1.882%20c%200,0%20-1.179,1.611%20-1.752,2.387%20-2.025,2.736%20-0.234,5.928%206.376,5.928%207.636,0%2025.901,0%2025.901,0%20l%206.119,-8.314%20h%20-36.644%20z'%20id='path4'%20/%3e%3c/svg%3e)

'%20rx='8'%20stroke='%23bcc8c9'%20stroke-width='2'%20width='32'/%3e%3c/g%3e%3cg%20fill-rule='nonzero'%20transform='translate(4%2011)'%3e%3cpath%20d='m5%2010c3.6164%200%205.1918-2.589%207-5h-12v5z'%20fill='url(%23a)'/%3e%3cpath%20d='m19%200c-3.6164%200-5.1918%202.589-7%205h12v-5z'%20fill='url(%23b)'/%3e%3c/g%3e%3c/g%3e%3c/svg%3e)
'%3e%3ccircle%20cx='6'%20cy='6'%20fill='%23e7001a'%20r='6'/%3e%3ccircle%20cx='14'%20cy='6'%20fill='%23f49b1c'%20r='6'/%3e%3cpath%20d='m10.0120165%201.53555826c1.2154822%201.10762756%201.9879835%202.72357793%201.9879835%204.54236382%200%201.73521336-.7725013%203.31240756-1.9879835%204.40206222-1.23951522-1.08965466-2.0120165-2.66684886-2.0120165-4.40206222%200-1.81878589.77250128-3.43473626%202.0120165-4.54236382z'%20fill='%23e7001a'%20opacity='.3'/%3e%3c/g%3e%3c/g%3e%3c/svg%3e)
'/%3e%3c/g%3e%3c/svg%3e)
'%20rx='8'%20stroke='%23bcc8c9'%20stroke-width='2'%20width='32'/%3e%3c/g%3e%3cg%20fill-rule='nonzero'%20transform='translate(9%207)'%3e%3cpath%20d='m13.1882692%204.38709677c-.0161538.10611332-.0346154.21459787-.0553846.32604649-.7136539%203.76494772-3.15519231%205.06557681-6.27346155%205.06557681h-1.5876923c-.38134616%200-.70269231.28454963-.76211539.67106293l-.81288461%205.2973662-.23019231%201.5015923c-.03865385.2537235.15173077.4825488.40096154.4825488h2.81596154c.33346153%200%20.61673077-.2489809.66923077-.5868837l.0276923-.1470173.53019231-3.4572784.03403846-.1896998c.05192308-.3390883.33576923-.5880693.66923077-.5880693h.42115385c2.72826922%200%204.86403842-1.1381986%205.48826922-4.43186095.2607692-1.37591618.1257692-2.52478545-.5642308-3.33278792-.2088461-.24364565-.4678846-.44579448-.7707692-.61059616z'%20fill='%23009ddd'/%3e%3cpath%20d='m12.4482461%203.03882178c-.1235354-.04130518-.2509925-.07885534-.3817178-.11265049-.1313789-.03304414-.2660259-.06233326-.4045946-.08786737-.4849907-.09012039-1.0163889-.13292758-1.5856974-.13292758h-4.80546032c-.11830635%200-.23073007.03079114-.33138852.08636538-.2215793.12241352-.38629313.36348556-.42616433.65862983l-1.02227149%207.43943795-.02941318.21704c.06732351-.4896541.43139334-.8501357.86344031-.8501357h1.79877949c3.53285%200%206.29899634-1.64845208%207.10753204-6.41732258.0241842-.14118861.0444466-.2786222.0627482-.41305178-.2045851-.12466653-.4261644-.23130899-.664738-.32218038-.0588263-.0225301-.1196136-.04430919-.1810544-.06533728z'%20fill='%23202c69'/%3e%3cpath%20d='m5.54653201%204.22203226c.03519231-.21551613.18057693-.39154839.37615385-.4803871.08942308-.04058064.18807692-.06306451.2925-.06306451h4.24153844c.5025%200%20.9715385.03125806%201.3996154.09706451.1223077.01864516.2411539.04003226.3571154.06416129.1153846.02467742.2278846.05209678.3369231.08225807.0542307.01535483.1078846.03125806.1603846.04716129.2105769.06635484.4061538.14477419.5867308.23525806.2123076-1.28706452-.0017308-2.1633871-.7338462-2.95690322-.8071154-.87358065-2.2638462-1.24758065-4.12788462-1.24758065h-5.41153846c-.38076923%200-.70557692.26322581-.76442308.62132258l-2.25403846%2013.58080642c-.04442307.2687097.17365385.5110968.45865385.5110968h3.34096154l.83884615-5.05887096z'%20fill='%231f3a85'/%3e%3c/g%3e%3c/g%3e%3c/svg%3e)